Christmas in July… Seriously

Christmas in July

pre pre pre pre pre pre Thanksgiving sale in July? (today at Belk)


Christmas in July??

June left us in the blink of an eye. It’s hard to believe that the 4th of July is this week!

Being a bit stir-crazy today, I was out and about wandering stores. Summer is on sale! I did see really cute shoes on a big-ole sale table at Belk! Yep! Bought me some.

Little did I know I was just in time for their pre-Thanksgiving sale! Check out the sale sign. It’s practically Christmas in July!

In case you’re worried that Christmas will be here before you know it… It’s here people!

And if you are tired of summer already, Hobby Lobby is the place for you. There’s a different season on every isle. With Summer super discounted! 😉

Hobby Lobby

Hobby Lobby – Fall in July

Hobby Lobby

Hobby Lobby – Thanksgiving in July

Hobby Lobby – Christmas in July

Christmas in July

Thank goodness I didn’t miss the pre-Thanksgiving sale! 😀

DIY Christmas Village Houses

wood house 10Last week I decided I would be a watercolor painter. Bought the paint and the paper, painted a few landscapes, then discovered I suck at it.

Onward.

This past week, I thought it would be fun to be a maker of Christmas village houses. This worked out a little bit better. 😉

I have oodles of scrap wood in the garage, so this was a cost-free project.

wood house 1

I made a template for the two “peak” sides of the house. I should have made the roof angle 45 degrees, but I didn’t. A 45 degree angle would have made cutting the roof pieces a whole lot easier. Live and learn.

wood house 2

I started out using wood glue to put the house together, “clamping it with painters tape. I finally got smart (or un-lazy) and brought the nail gun in to the house. MUCH faster than waiting for glue to dry!

wood house 3

My green tape “high-tech” clamps. Whatever works I say.

wood house 5

My miter saw does not cut angles larger than about 47. Making the cuts for the roof tip nearly made me crazy. So I gave up and improvised.

wood house 6

I took a small wood dowel and glued it to the top of the roof peak to fill in the gap. It’s not perfect, but it made it round and smooth and easier to attach the music sheet paper to the roof.

wood house 8

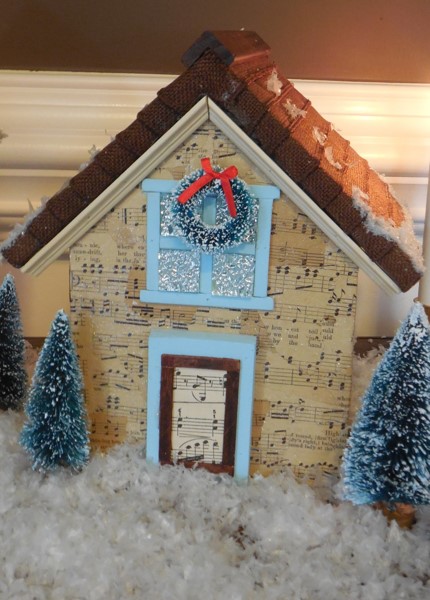
I decoupaged music sheet paper to the roof and door and painted the walls of the house a light blue. The trim around the door and the shutters were stained with a touch up stain pen. (Who knew touch up stain pens would come in handy?) Then I applied decoupage glue on top of the music sheet paper and sprinkled “snow” on the roof.

wood house 9

The next house I made was decoupaged in music sheet paper. The roof is covered with wired ribbon, cut in half and hot glued to the wood on the roof. This house has a 45 degree angle roof, which made it oh so simple to miter the roof pieces. I used wood trim pieces to cover rough looking edges.

wood house 10

Getting ready for Christmas! Now I’m working on a Christmas village house made from paper. Stay tuned. 🙂

Linking to:

The Shady Porch

Finding Fabulous

Fall Decor Home Tour

Today I’m taking you on a Fall decor tour of my creative and talented friend’s home. Crys is the maker of the Fall wreaths I posted a week or so ago.

Fall is Crys’s favorite season and she demonstrates this in her home. Every room is touched with a little bit of Autumn. Come take a look around.

outside Fall decoration

The front door is decorated with garlands of leaves, flowers and pumpkins.  You can see a close-up of the gorgeous wreath she made HERE.

Fall decoration

A wreath and little touches of fall makes her entry warm and welcoming.

crys halloween 4

Crys set her dining room table with red tones of Fall. This dining room table will need to be another post. She made it out of old sewing machine stands, reclaimed wood and a glass top, all of which she already had. I’m not a dining room girl myself, but this table is beautiful!

crys halloween 6

Crys used leaves, mini pumpkins and gourds to decorate her mantle. The clock on the wall was a antique/thrift find! She spray painted it to match her the colors in that room. Yes, I’m jealous of the clock. I wish I had seen it first! 😉 And the mantel backsplash… she did herself! Yep, we are DIY soul sisters! 😀 I will have to do a post on this mantel too.

crys halloween 5

Her shelf is decorated with leaf picks, pumpkins and gourds and antique jars filled with more antique goodies. The metal piece on the wall was another antique/thrift find. She spray painted it white and added black stain to it.

outdoor fall decoration

Gorgeous outside fall decoration

Crys and her Hubby have the most gorgeous backyard. When you’re back there, it feels like you are on vacation somewhere else. This beautiful fireplace is just part of the back deck and patio. Again, she used leaf garland, pumpkins, gourds and flowers to decorate.

crys halloween 8

Thanks you Crys for letting me show off your Fall decorated home! Crys inspired me to put planters and flowers on my front porch. Actually she was the one to play in the dirt, making sure the green plant thingys were planted correctly. That’s a first time in 10 years my front porch had anything on it beside a welcome mat. I’m just hoping she will come over and keep these living things alive for me. That’s not too much to ask, is it?


“Magical” Christmas Mantel – update

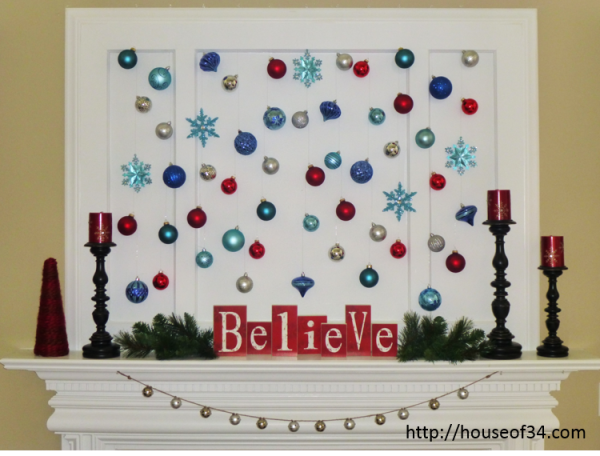
Remember my “Magical” Christmas Mantel post where I said I redid the mantel three times before I was happy with it?  Well, it’s four times now.  It’s a sickness.  I can’t help myself. 😉  THIS is the final mantel.

Mantel with hanging ornaments

The Bell Garland came from my friend CereusArt. Check out her Etsy shop for really cool coastal decor accessories and beach themed gifts!


Linking to: The Lettered Cottage

DIY Hand Painted Wood Sign

Happy Friday!

Last weekend, a couple of my girl friends and I went to a big antique show.  It was so exciting!!  (I will have to do a blog on the crazy things I picked up.)  Towards the end of the day, we came across these cool wood doors.  Piles of them.  For only $2.00 each!  I picked up eight of them without having an idea what I was going to do with them.  (That happens a lot!)

One of my friends suggested making hand painted wood signs for the Holidays.  Here’s how I did it.

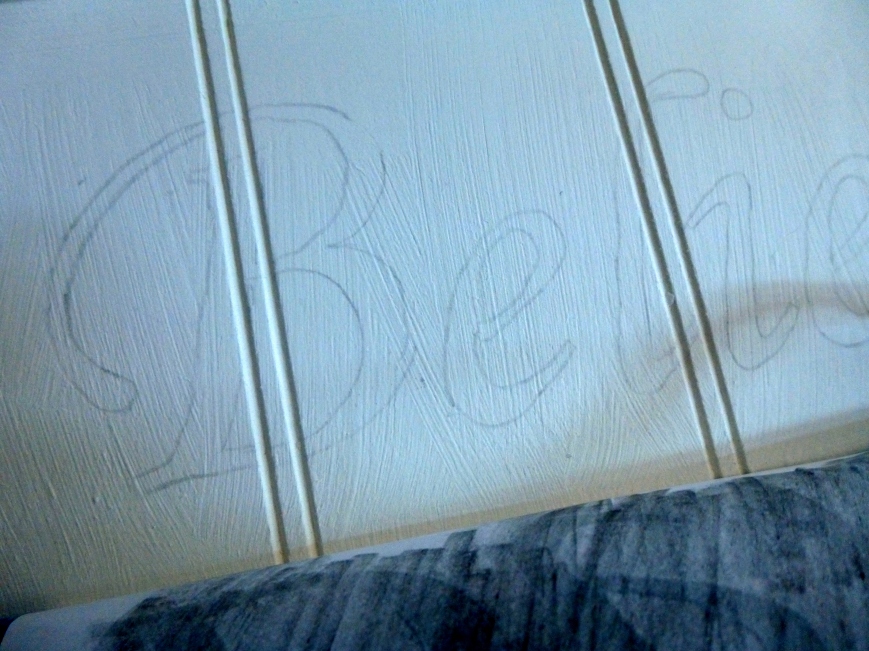
I printed out the words I wanted to use.  Not having tracing paper, I just took a regular pencil and scribbled on the back side of the letters.  Then I traced the outline of the letters and the pencil mark transferred to the wood door.  Woohoo!

Now the tricky part for me was filling in the letters.  I only had paint and a paint brush, reading glasses and one working eye!  Depth perception is not my strong point!  It took me FOREVER to paint the letters.  Either I thought I was touching the wood with my paint brush and wasn’t or I aimed for the outlines and completely missed.  If it wasn’t so frustrating, it would have been comical!  I would strongly suggest a paint pen.  I didn’t have one.  And two working eyes would be helpful too. 😉

I should mention that before I painted the letters, I gave the center section a coat of off-white chalk paint.  (I still didn’t know what design I was doing at this point.)  After the letters were painted on, I painted the rest of the front with the chalk paint.  Then I taped off diagonals lines with blue tape and painted them red.  After the red paint dried, I sanded everything to distress it a bit then I applied a light-colored wax to seal it and age the off-white paint a little more.

And here it is… This House Believes.  And this house also believes you can Do-It-Yourself.  Had to throw that in! 😉  Just FYI… Doors in many different shapes and sizes can be found at your local Habitat Restore.  Some used, some new, and they cost very little.

I’m going to put eye hooks in the top edge of the sign and use either ribbon or a small chain to hang it outside the front door.  Maybe embellish it a bit with Christmas picks or decorations.

This was really an easy project to do!  And the first Christmas thing I’ve done so far.  I love the Holidays!  Have you started to think about decorating for the Holidays yet?

More Holiday Decor

Happy Monday!  I hope everyone had a lovely Thanksgiving.  My family and I definitely did!  I have declared going out for dinner on Thanksgiving our new family tradition.  The restaurant, Red Rocks, had a fantastic buffet with traditional turkey day fixings, plus oodles of other yummy options.  It was perfect.  (And I didn’t have to eat meat!)

I didn’t shop on Black Friday.  Back in the day I would have been out the door at the crack of dawn with a game plan.  These days, my game plan is waking up after the coffee has been made and the kids have been fed.  Sleep has trumped shopping.  I don’t know if that is good or sad. : )

But we did get the Christmas lights up outside, and the house and tree was decorated to the sounds of Trans Siberian Orchestra.  I made a wreath for the door inspired from ideas I have seen on Pinterest.

The wreath started out as pool noodle that I ducted tape together and wrapped with yarn.  The “poinsettia” are made from felt, decorated with small christmas ornaments and dried flowers.  Tis the season!

Easy Holiday Decor

A few posts ago, I put up some simple Christmas decoration ideas.  One of them was this “Believe” sign.  I had big plan to recreate it from scratch, but what do ya know… I came across it at Home Goods yesterday!  And it was only $12.99!  Even me, Miss DIY-er, knew it was well worth buying instead of making.  It was the only one there, so it was just waiting for me. : )

I have started a little Christmas decorating, mostly with the things that are handmade.  Some I had for years, others I made just recently.  All are easy to do!

BELIEVE! (yes I do!)

These little birds I picked up at the Southern Christmas Show last week. They are sitting of books that I wrapped in holiday paper.

This pillow was fun to make. I’m addicted to making flowers! Pinterest gave me this idea.

Styrofoam balls wrapped in ribbon.

Styrofoam trees wrapped in yarn (red and green) and faux fur trim (white).