Creating a Wall Collage

I’ve been wanting to create a wall collage of old family pictures. Seemed like a simple thing to do.

Not so when you can’t make up your mind. 😉 I bought and returned more frames than I care to admit, then ended up using all the ones I already had. Saved a bunch of money… not so much on time.

But that’s okay! Old pictures are so beautiful. I have several from the 1920’s and 1930’s of my grandparents. I’m not completely finished with the wall collage, but it’s close.

Aside from figuring out the arrangement of the frames, this was an easy and inexpensive way to update a wall. Take a peek!

Wall collage

I didn’t use a paper template for the placement of the frames. I winged it with my hammer, nails, measuring tape and level. My way consist of multiple nail holes behind most some of the pictures. Probably not the best way, but it’s the “I want these frames on the wall NOW” way. 🙂

wall collage

wall collage

One of Those Days

http://elsiewho.files.wordpress.com/2012/01/funny-pictures-cat-has-been-taken-by-the-vacuum.jpgEver have one of those days when you didn’t feel like getting out of your pajamas?  But then you decided you should probably clean the house? But when you were vacuuming, your nightgown got caught in the vacuum? AND in your panic, as you reached for the off button, you hit the turbo button instead?  Now you don’t have a nightgown or a working vacuum?

Sorry Mom.


Model Home Decorating Ideas

One of my most favorite ways to get decorating ideas is to go model home hopping.  That means I take my camera and my BFF and we find all the new construction model homes and take a tour.

The best thing to do, if you model home hop, is to be honest with the sales person there.  Don’t pretend to be a potential home buyer.  It’s a waste of their time.  Tell them you are just out looking at model homes for fun and they will leave you alone.  They are actually used to people looking a model homes for decorating ideas.

Here are some pictures I snapped yesterday.  Now I have even more ideas running through my head! 😉

bar

The butler’s pantry in this home is also a bar area.

bathroom cabinet color

I took this picture because I liked the color of the cabinet. Notice the plain, boring mirror on the wall! Tisk Tisk! 🙂

bedroom ceiling

I don’t need to say anything about this photo, but I will… Look at that ceiling!!! Love it.

bedroom wallpaper

The wall behind the bed is covered in wall paper. Makes a great accent wall!

dining room windows

Look at the arched windows in this photo.

dining room

The ceiling in this photo is covered in wallpaper. The back wall is painted a chocolate brown. I’m not a fan of dining rooms, but this is a pretty space.

framed bathroom mirror

This builder did frame out the mirror. Do you see how they added an extra horizontal board?

kitchen eating area

A cute kitchen eating area.

master bedroom

Bright and happy master bedroom.

pool room with wood beams

Beamed ceilings! Ahhh… someday.

red bedroom

In this bedroom, board and batten was used as a headboard effect. This has my head spinning with ideas!

staircase

Beautiful staircase. The dark wood against the white! Love.

upstairs hallway

I took this picture because I like the hallway floor. Although the different levels could be dangerous in the dark! (If you’re me!)

white kitchen

White/Cream cabinets.

hanging kitchen light

Love this lighting over the kitchen table.

island hanging lights

These gorgeous lights are hanging over a kitchen island. I wish I would have asked where they came from.

Have you ever model home hopped?

Wood Wall Planks

Have you ever walked around a home improvement store and see something you didn’t even know you wanted?  A project you hadn’t thought of before and suddenly a light goes off and you think “Where have you been all my life”?

It happened to me.  What was the object of my desire you ask?  Wood wall planks!

I know, they’ve been around forever, but it never occurred to me to think about the possibilities.  I have a couple of projects on my radar at the moment; redoing my son’s bathroom and doing something with the kitchen island.  I think I just found my inspiration!

Dark wood paneling

I absolutely adore navy blue! How beautiful is this!?

Love the horizontal paneling

Horizontal! Oh the possibilities.

an idea of what i am looking to do with beadboard paneling in the bathroom - like the trim on the top

bathroom mirror ideas for a small bathroom

full bath after remodel with MDF on sides of tub

Happy is in the House

I started out 2012 with the blog name Ode to my Abode.  This past year I changed it to House of 34.  I wanted to share more than just DIY projects.  House of 34 is about sharing ideas and experiences, laughing and making fun of myself (and occasionally others, all with love of course), as well as DIY Projects.  My goal in writing about my DIY projects, though, is to encourage you to try new things yourself.  I’m not an expert at anything.  But for reasons not yet known, 😉 I’m not afraid to try anything either.  I believe if you have an idea in your head, you can do it.

Thanks for all your support!  Blogging has been a wonderful experience.  I have “met” some pretty awesome people in cyberspace! 😀  House of 34 is a happier place with all of you in it.

Thought I would share some of the top posts from 2012.  Thank you again!!

Top Five DIY Projects

Framing a Bathroom Mirror

Storage Cabinet Makeover

Arm Chair Makeover

Entryway Curtains

Entryway Curtains

Painted Architectural Pediment

Most Popular Humor Post

Pinned Image

Most Popular Wednesday Wisdom

Wednesday Wisdom

“Magical” Christmas Mantel – update

Remember my “Magical” Christmas Mantel post where I said I redid the mantel three times before I was happy with it?  Well, it’s four times now.  It’s a sickness.  I can’t help myself. 😉  THIS is the final mantel.

Mantel with hanging ornaments

The Bell Garland came from my friend CereusArt. Check out her Etsy shop for really cool coastal decor accessories and beach themed gifts!


Linking to: The Lettered Cottage

Painted Architectural Pediment

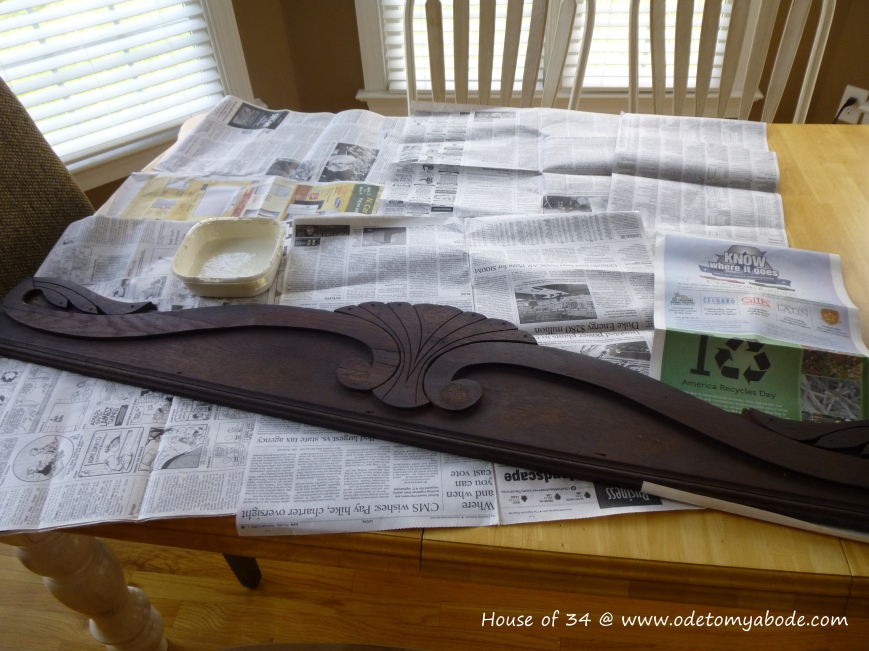
I have been looking for an old architectural pediment to hang over the bookcases in my “dining room turned office“.  I found this piece at an antique store. I have no idea what it was in its previous life.  But that’s okay… it was only $10.00 and just what I was looking for. 😀

I didn’t paint it right away.  I don’t know if you know this about me, but I tend to change my mind a lot once in a while.  It sat for some time before I decided to go ahead and paint it.  You just never know when another bright idea will pop in your head.  I had to be sure.

architectural pediment

The BEFORE

Before painting, I gave the piece a light sanding, then wiped it down.

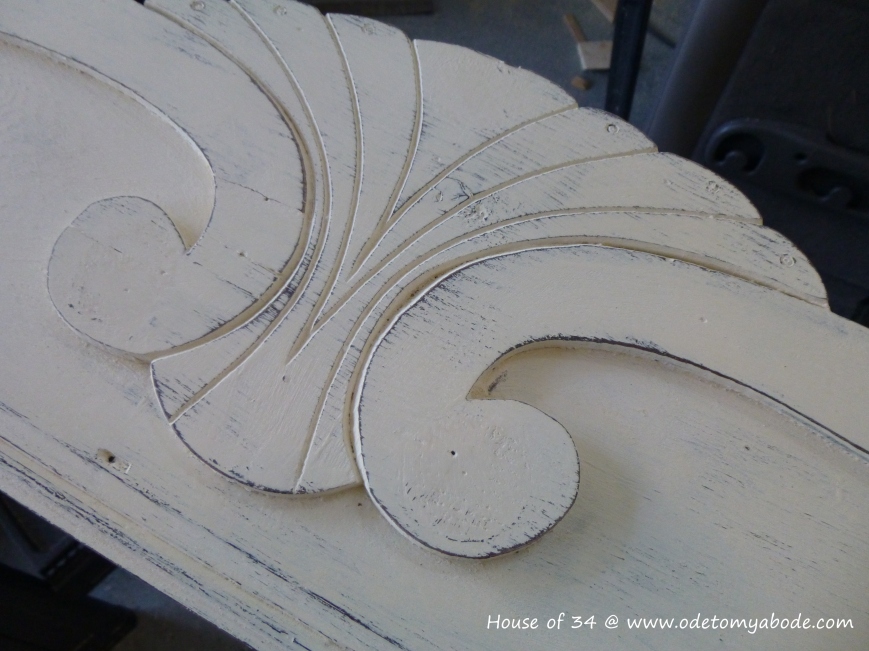
I used two coats of Annie Sloan “Old White” chalk paint.

After the paint dried, I sanded the entire piece again, concentrating more on the edges for a distressed, aged look.

architectural pediment

I love how easy Annie Sloan chalk paint is to sand!  That’s it.  It literally took only a couple of hours to complete.  I’m not a patient painter, so there are no hours or days between paint coats for this girl.  If it feels dry and it needs another coat, then it gets another coat. If the second coat feels dry, and it needs to be sanded, then it gets sanded.  Yes I am a DIY Rebel. 😉

Now it’s hanging above the bookcases in my “Dining Room turned Library“.

Finding a “one of a kind” makes antiquing and thrifting so much fun!

This Loon has been in the family for almost 100 years. My daughter admired it at my in-laws house in New Hampshire. Somehow, it managed the long trek to my house where it now resides for all to see. Obviously I need to teach my daughter to admire a 100-year-old piece of furniture, not a century old bird! I will work on that! 😉

Linking to: House on the Way mop it up mondays {nifty button}

Answer Me This

I’m cleaning my house today.  Joy.  It’s not one of my strengths, at all.  Not even a little.  But bathrooms don’t clean themselves.  While I’m cleaning the yuckiest rooms in the house, the thought strikes me (AGAIN), why do the grosses rooms in my house not have windows?  All three and a half baths in my house are windowless rooms just screaming to be aired out!  Seriously!?  In what world is a bathroom, with no source of fresh air, a good idea??

So answer me this… What would you change or do over if you could rebuild your house?

I love my house, but if I could do one thing over I would definitely make sure all the bathrooms have windows.  The kind that opens up! 😉

What would you change?

DIY Entryway Table

Part of my entryway update was making a new entryway table.  Yes, I could have bought one quite easily, but what fun is that?  I had a piece of wood I picked up at Lowes, probably six months ago.  This past Monday, I went antiquing with my parents and picked up 7 spindly legs for $20.00.  Not too bad!  It was just what I was looking for.  So I went to work.

Before I begin, I just want to reiterate that I’m not an expert at wood working or building things.  I just want to do it, so I do.  I don’t follow rules (except wear safety glasses at all times and keep your hands away from sharp spinning blades!!!).  Maybe it’s not that I DON’T follow rules, I just believe there ARE NO rules when it comes to creativity.  If you think you can, you can!

1 ft x 4 ft knotty, butcher block looking wood from Lowes.

The first thing I did was stain the board.  I used MinWax Wood Finish in Expresso.  I stained the wood before I really knew what I was going to do with it.  It may be better to wait until you have your project assembled before you stain.

I picked up inexpensive base moulding at Lowes to use as trim around the raw edges of the table top.  Take a look at all the trims and mouldings home improvement stores have.  Just because the sign says this is a chair rail or this is a base board doesn’t mean that’s what they are ONLY for.  The possibilities are endless!

Look at that edge! Love it when cuts work out the first time. 😀  I used a miter saw but a miter box will work as well.  I glued the trim to the edges of the table, using blue tape to hold it in place. Once the glue was almost dry, I hammered in small brad nails for added support.

Here’s the tools and products I used.

If you are going to drill inside your house, I suggest putting a piece of scrap wood under the wood you are going to drill through. You don’t want to have to explain why there is a hole in your floor. 😉

Ok, So the rest of the construction happened in my entryway.  The garage was too hot.  While I love working with wood and tools, I don’t necessarily think one should have to sweat to create.  Just don’t tell my Hubby I used our front entryway as my workshop. 😉

For the size of the legs I was using, I measured 3/4 inch from the edge of the table to find the center where I needed to drill for the leg hole.

I drilled deep enough to just go through to the other side of the table top with the point of the circle drill bit. Then I flipped the table top over and used a countersink drill bit to drill a hole for the screw that would attach the leg to the table.

I drilled a hole in the bottom of the table legs. The legs have a notch that fit into the holes I drilled under the table. I added glue to the hole, placed the leg in and then used a flat head screw in the countersunk (is that a word?) hole to attach the leg to the table.  Sorry I don’t have a picture of that.

The table is so lightweight that I didn’t need to add any extra support for the legs.  The glue and screws were all the legs needed to be sturdy.  But please don’t come over and sit on it.  I can not guarantee your bottom will remain on the table and not end up on the floor.  😉  Wood putty was used to fill the holes on the top of the table and once that was dry, I swiped a little stain over the holes.  I stained the trim around the table in the same finish as the top and the legs are painted with Anne Sloan paint.  The legs were sanded lightly for a worn look.

And here’s the finished table. I’m kind of diggin it! 😀

So with just four legs, one piece of wood and some moulding and you can have yourself a table!  What do you think?  I think if I can DIY, you can DIY!

Entryway BEFORE and AFTER

Linked to:   mop it up mondays    {nifty button}    I Heart Nap Time  House on the Way  The Girl Creative   Photobucket  Homemade Projects ~ Add Yours! {10-30}Home Stories A2Z  Primitive and Proper

Entryway Curtains Revealed

Entryway Curtains Revealed

About a month ago I did a post on Entryway Ideas.  I was looking for ideas and inspirations to update my empty foyer.  And I asked you to give me your opinions on the pictures I found.

The majority of you loved the idea of using drapes at the front door.  It was a look I never would have thought of had I not seen a picture on Pinterest.  I loved it too!

Entryway Curtains

Houzz via Pinterest

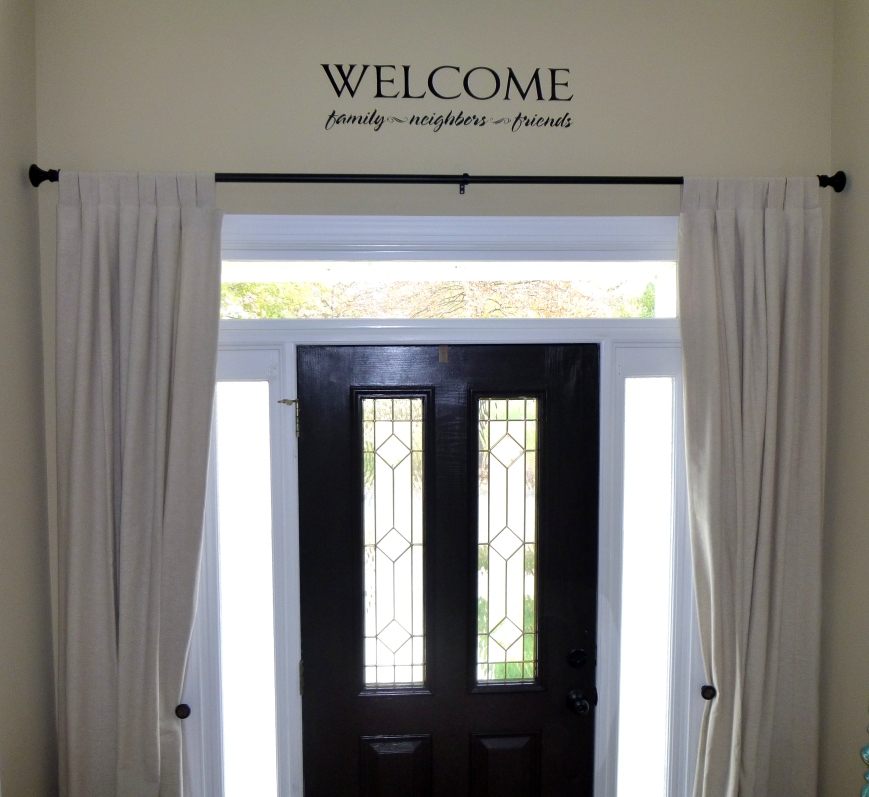
I picked up a set of drapes at Ikea.  Ikea sells curtains/drapes at crazy, ridiculous, cheap prices.  And they come in a package of TWO!  A pair!  You don’t have to buy two packages to cover one window.  They come long and unhemmed so you can customize the length to fit your window.  It’s brilliant!  These look like linen and were only $20.00!

Entryway Curtains

The “Welcome” wall art came from Hobby Lobby. $14.00 with a coupon.

Entryway Curtains

I bought the rod at HomeGoods for $14.99. The knobs holding back the curtains were $2.00 at Hobby Lobby.

Entryway Curtains

Entryway is complete. The console table is a DIY creation. More on that soon. 😉

What do you think?  Something you might try?